When thinking about e-commerce in the Baltics (Latvia, Lithuania, Estonia), you are most likely leaning towards using WooCommerce or Magento as your platform for managing the store.
That can make your journey either very frustrating (in case of WooCommerce) or expensive (if you choose Magento). In the Western countries that wouldn’t necessarily be the case - you could start your e-commerce business quite easily with Shopify.
Why it is different in the Baltics
Notable difference in the Baltics is customer behavior which has been led by up-to-recently very niche shipping solutions (pickup points) and direct banking integrations for payments.
This does not sound like anything groundbreaking, however, Shopify does not offer custom shipping and payment integrations for their hosted checkout page.
Note: Shopify hosts your store on their servers so you don’t need to worry about infrastructure but that comes with limitations.
Another significant difference is that these countries speak multiple languages. In all of the Baltic states you likely want to offer Russian as the secondary language in your store to increase conversions and overall customer experience.
Shopify does not offer a multi-lingual setup out of the box and that can be daunting for many businesses considering Shopify as their home of e-commerce. We’ll address that later.
Shipping and payment integrations
The main issue we need to address here is the fact that outside of the Shopify Plus plan (which starts at roughly $2000 / month), we have no available customization for Shopify Checkout.
Hence, some solutions include having Shipping selection in the cart-page instead and then passing that data to the order as attributes.
That works but has limited customization and breaks the fluidity of the buying experience. You want to reduce the amount of distraction the buyer has when making their purchasing decisions and this will force them to make these decisions while still being in your storefront.
Keep in mind - this still does not solve the payment issue. If you want to offer DPD or Omniva pickup integration for your customers, you are likely to consider direct banking integrations at least for Swedbank which has a very dominant position in the market.
So how do we tie all of this together?
Custom checkout experience. We utilize access to Shopify APIs to build a custom experience that allows us to have the integrations we desire and integrate it with Shopify order flow to get the most out of this e-commerce platform.
This comes with many benefits to enable the latest trends like upselling directly in the checkout as well as loyalty programs.
This isn’t a simple feat. You do need technical understanding of Shopify API and programming skills to achieve this. Also, here we are breaking away from a huge selling point of Shopify - they manage the infrastructure, you worry about sales.
The best solution I’ve come up with to lower the burder is to build the Checkout on top of Serverless infrastructure. As long as your code works, you do not need to worry about the servers.
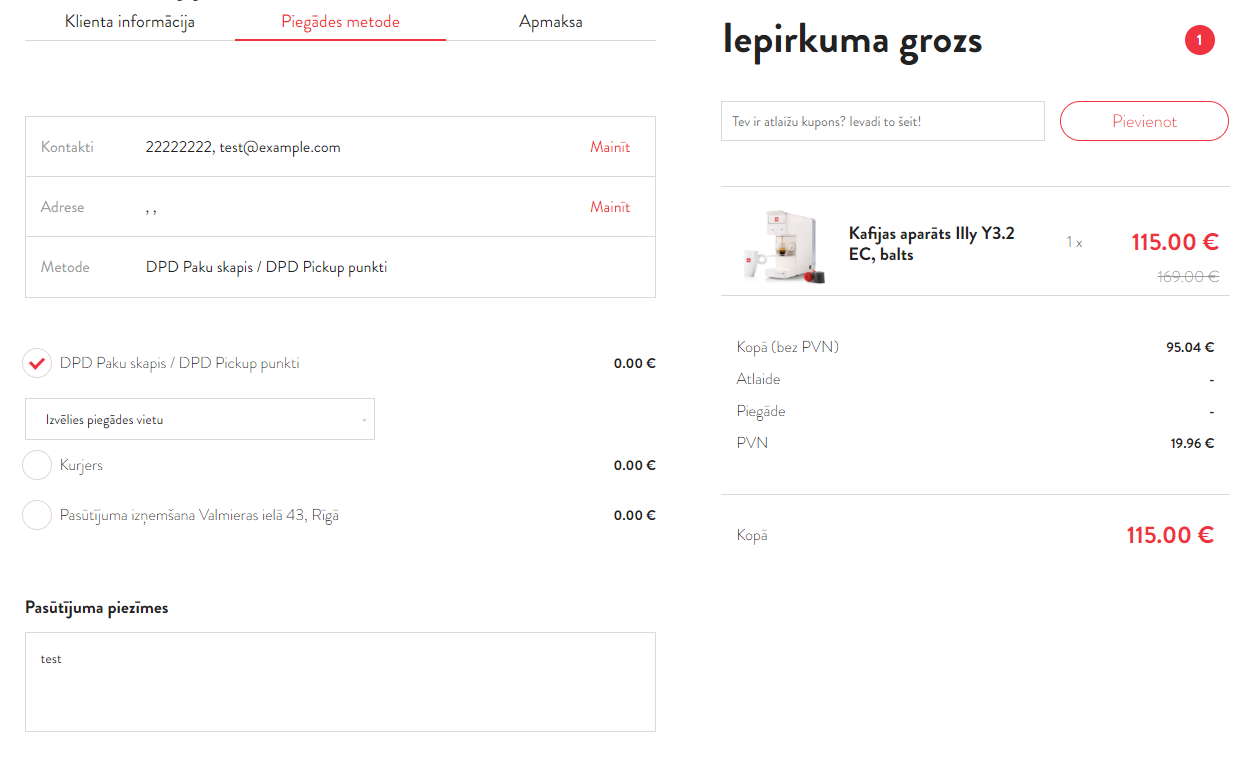
Note: you will be losing access to discount code performance tracking as well as built-in analytics and gift card functionality with Custom Checkout. Luckily, there are alternatives for this - most notably - Google Analytics are far more powerful than what you would see in Shopify dashboard.
Multiple language support
I will not go into detail on this issue as it’s quite easy to solve.
Shopify offers a very good language editor, certainly better than most other e-commerce platforms, however, it only supports one language to be active at the same time.
To provide access to other languages you need to use apps like Weglot. This will, for a monthly fee, provide translation not only for your theme resources but also the product descriptions, all of the custom section blocks and more.
The translations are also SEO friendly.
Verdict
If you want a powerful e-commerce platform at low cost - Shopify is definitely the top choice. Little to no maintenance cost for the Store and infrastructure and a very quick setup time will get you quickly off the ground.
Problems that limit access to local markets can be alleviated with some investment in custom developed checkout solutions and apps readily available on the Shopify App Store.
Where to go from here
If you have decided to begin your ecommerce journey, you can sign up for Shopify here. Plans start at $29/month.
If you are already doing business and consider migrating over to Shopify to lower your costs - you can get in touch with me for a free consultation to discuss options for your business.
I will address these issues in more detail over time so don’t forget to subscribe to my newsletter at the bottom of the page.
